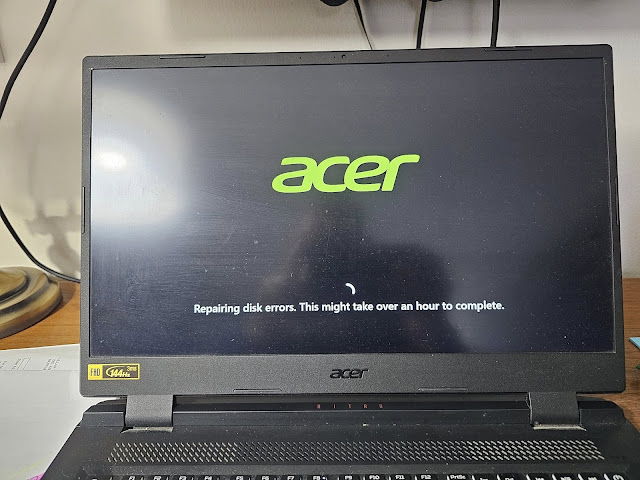
We’ve all been there. You boot up your Windows 11 PC and suddenly… BAM… you’re greeted with the dreaded “Repairing disk errors. This might take over an hour to complete” message. It feels like the computer is taunting you, as if it’s saying, “Hey, how about you take a nap while I work my magic?”
Don’t worry, though! While the wait may feel eternal, it doesn’t have to be a nightmare. Let’s break down how you can fix this pesky error without getting too technical or stressed out. And hey, we might even make you chuckle along the way.

Why Does This Happen? (The Mystery of the Disk Errors)
Before diving into the solutions, let’s talk about why your PC might be throwing this error at you. Well, imagine your computer’s hard drive is a crowded library full of books (your files). If the books are all jumbled up or some of them are damaged, it’s going to take a while to find the right one when you need it. Windows 11, in all its glory, is trying to organize this chaos for you. But sometimes, it takes a little longer than expected.
Step 1: Give It Some Time (Patience, Young Padawan)
First things first—don’t panic. Windows might take a while to repair your disk, especially if you’ve been pushing your PC to its limits with a mountain of files and apps. Think of it like a spa day for your hard drive—give it time to rejuvenate!
Here’s the thing: If Windows says it might take over an hour, it might just take over an hour. Grab a snack, a coffee, or maybe even a book, and let your PC do its thing. Don’t interrupt the process—trust us, it’s like telling a chef to hurry while they’re making your gourmet meal. You’ll end up with a burnt disk instead of a perfectly repaired one.
Step 2: Run CHKDSK (Let’s Fix Things with a Little Command Line Magic)
Okay, so let’s say you gave it the “nap” time but your computer is still stuck in “repair mode.” Time for some hands-on action, but don’t worry, no need for a PhD in computer science. Let’s use CHKDSK—a friendly little tool that can scan and fix disk errors. (It’s like a magic wand, but without the sparkles.)
Here’s how:
-
Open Command Prompt as Admin
- Press
Win + Xto open the special menu (a.k.a. “The Cool People Menu”). - Select Command Prompt (Admin) or Windows PowerShell (Admin). If you’re stuck on the login screen, you can boot into Windows Recovery Environment (WinRE) by restarting your PC and pressing
Shift + F8orF8(try your luck). If all else fails, just Google your PC’s special key for this!
- Press
-
Run the CHKDSK Command
In the Command Prompt, type this command and hit Enter:- The
/fpart tells Windows to fix any errors it finds, and/rchecks for bad sectors and tries to recover them. Don’t ask me how it does it—it’s like magic!
- The
-
Restart Your PC
If you’re asked to schedule a scan the next time your computer restarts, just typeYand hit Enter. -
Let It Work
Windows will start scanning and fixing the errors when it reboots. This might take a while, so don’t forget to check in for a snack or another episode of your favorite series. Again, patience is key. Trust the process, and soon enough, your disk will be in tip-top shape!
Step 3: Update Your Drivers (Because Outdated Drivers Are Like Old, Rude Maps)
Drivers are like the GPS for your computer’s hardware, guiding it to the right locations. When they’re outdated, they get confused, and that’s when things go sideways. Let’s make sure your drivers are up-to-date to avoid any future drama.
-
Open Device Manager
- Press
Win + Xand select Device Manager.
- Press
-
Update Your Disk Driver
- Expand the Disk Drives section.
- Right-click on your hard drive and select Update Driver.
- Click Search automatically for updated driver software and follow the instructions.
-
Restart
- After updating, restart your computer to make sure everything is properly installed. Fingers crossed, you won’t see the dreaded disk error again!
Step 4: Run the System File Checker (SFC) – It’s Like a Broom for Your PC
If the CHKDSK and driver updates didn’t do the trick, there’s still hope. The System File Checker (SFC) tool can help fix corrupted system files, which might be causing all this mess.
-
Open Command Prompt as Admin (again, because it’s the VIP section of your PC).
-
Run SFC
In the Command Prompt window, type: -
Wait for It
Let the tool scan and fix the problems. This could take a while too, so maybe throw in a cat video break. -
Restart
Once the scan is complete, restart your computer to apply the fixes.
Step 5: When All Else Fails—Reset Windows 11 (The Ultimate Cleanup)
Okay, so if nothing else works, we’re going to pull out the big guns. This might seem like a last resort, but it’s like giving your PC a fresh start, just like spring cleaning for your system.
-
Go to Settings
- Press
Win + Ito open Settings.
- Press
-
Reset This PC
- Navigate to System > Recovery.
- Under Recovery options, click Reset PC.
-
Choose Your Option
- Select Keep my files (so you don’t lose your photos of cats).
- Follow the on-screen instructions to complete the reset.
Your PC will be back to a fresh state, and hopefully, the “Repairing disk errors” message will be gone for good!
Conclusion: Stay Calm, Fix the Errors, and Laugh Along the Way
So, the next time you see the “Repairing disk errors” message, don’t break into a cold sweat. Follow these steps, take a deep breath, and maybe even enjoy the break. After all, a little patience and some know-how can fix even the most frustrating of disk issues. Your PC will be back to its speedy self before you know it—and who knows, maybe you’ll even get to finish that coffee break.
Good luck! Your disk is in good hands.